Showing posts with label dips. Show all posts
Saturday, August 3, 2013
Frittering Away a Saturday Afternoon
A few days ago Tamara M, an internet friend of mine posted her tweaked recipe of onion pancakes that she saw on Just a Pinch posted by Toni T. I gazed lovingly at her pictures and read the recipe and knew it was going to be the way I was going to spend my Saturday afternoon. I had to have these crispy, crunchy morsels of chopped onions and seasoned batter. These gals call them pancakes, but to me they are fritters. Crispy in certain places and chewy in others and knobby and free formed all the way. So as you can see, I frittered away the afternoon and am O! so happy I did. Here's Tamara's recipe with a bit of tweaking from me:
Onion Fritters
Makes 12 to 15 small to medium size fritters
2-1/2 cups chopped onions, about 1/4 inch
3/4 cup AP flour
1/4 cup yellow cornmeal
1 T Splenda no calorie sweetener (sugar will work too of course)
2 tsp baking powder
1 tsp kosher salt
1/2 cup low fat buttermilk
1/2 cup fat free half and half
canola oil for frying
Clone Recipe for Outback's Bloomin' Onion Dip
From the internet, Tamara's suggestion as well and boy is it good!
1/2 cup mayo (you know I use the light)
2 tsp ketchup
2 T horseradish
1/4 tsp paprika
1/4 tsp salt
1/4 tsp garlic powder
pinch of dried oregano
1/8 tsp black pepper
dash of cayenne pepper
To make the dip, combine all ingredients with a small whisk and set aside in fridge while you're assembling the onion fritters.
To make the fritters, chop 2 medium onions which should give you the 2-1/2 cups necessary. In medium size bowl combine your dry ingredients (AP flour to kosher salt). Mix with a whisk or fork to combine and add your buttermilk and half and half, and then onions. (Although neither Tamara or Toni used buttermilk, I had some in my fridge and decided I'd give it a try. Love the tang, and next time I will use buttermilk only and see how that turns out.) By the way, your batter will be rather thick.
In large saucepan on medium/high heat add enough canola oil to cover bottom of pan, and then some. Maybe about 1/4 inch coverage all around. Place Tablespoons of the batter in the oil and saute for about 2 minutes on the first side. You'll know when to turn them over when you see the edges getting slightly brown, like this:
Flip them over and cook another 2 minutes or so on side two. Looking and smelling good already.
Drain on paper towels and serve. I made mine in 2 batches and kept the first batch warm in a low oven.
Give these a try with the Outback sauce. Or serve them with any type of sauce you like with your fried onion rings. I promise, you won't be disappointed!
And I'm now realizing it's going to be football season in a bit. This is great game food, and you'll want to make extra. Thanks Tamara and Toni, great recipe!
Saturday, November 10, 2012
Saucy
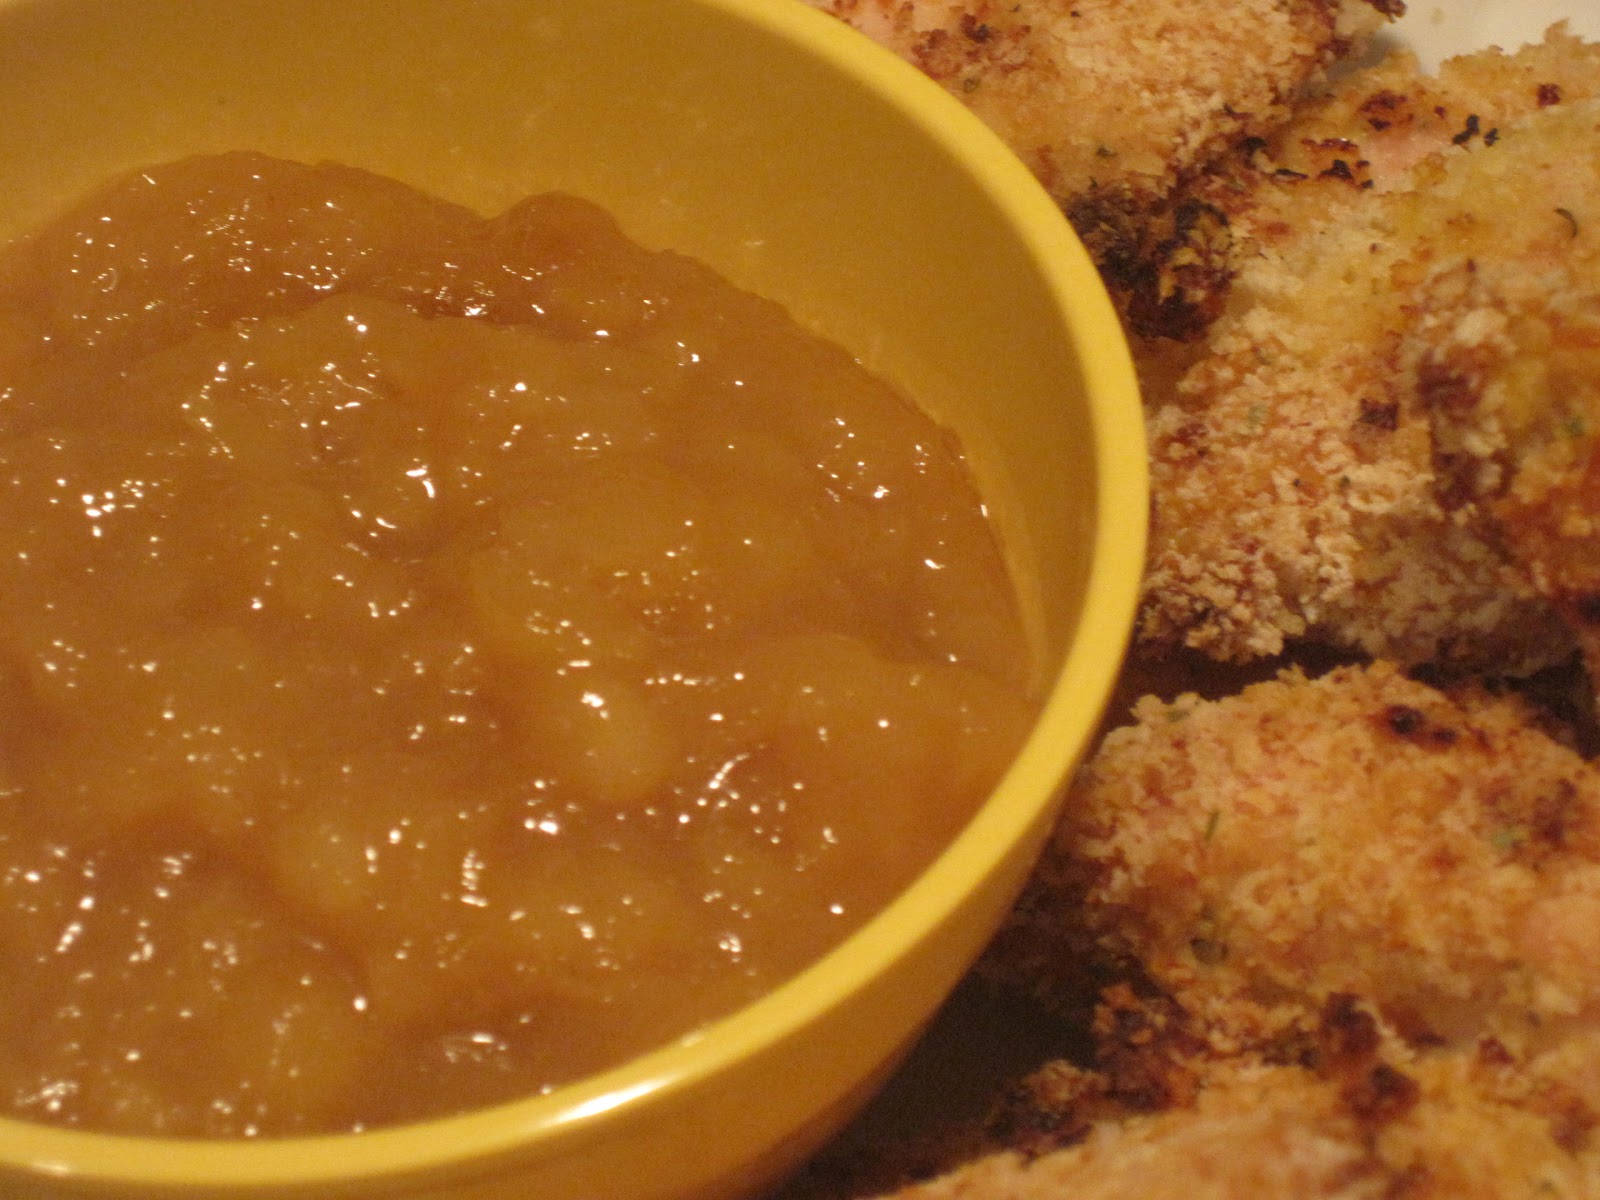
I'm a saucy kind of gal and jump at every opportunity to try a new dunkable dip or sauce. Carol J, an internet friend introduced me to a pineapple mustard sauce that I coupled with honey mustard chicken tenders, and I definately have to share this little gem. The sauce is sweet from the pineapple and brown sugar, and tangy from the lemon and mustard. Plus it's quick and simple. Here's my variation of Carol's recipe, and yet another version of chicken tenders.
Chicken Tenders with Pineapple Dipping Sauce
To make the sauce you'll need:
1/2 cup Splenda Brown Sugar Blend- or 1 cup regular brown sugar
1 T corn starch
1/4 tsp kosher salt
1 8oz can crushed pineapple
Juice of one lemon
1 T Dijon mustard
To make the chicken you'll need:
Soaking Mixture
1-1/2 pounds chicken tenders
2 large eggs
1 T Dijon mustard
1 T honey
1/2 tsp kosher salt
1/4 tsp ground black pepper
Splash of water
Breading Mixture
2 cups panko bread crumbs/flakes
2 T flour
1/2 tsp kosher salt
1/4 tsp black pepper
1/2 tsp garlic powder
1/2 tsp onion powder
1/2 tsp dried tarragon leaves
Cooking spray or olive oil for browning the chicken
This is a pretty quick fix, so let's get going. Wash chicken and set aside. Pre heat oven to 375 degrees. In medium size bowl add all soaking ingredients.
Whisk until combined. Add chicken and let it bathe in the egg mixture while you prepare the coating.
In separate bowl, combine the breading ingredients. Your oven should be pre heated by now, so you're almost ready to bake. Cover a baking sheet with aluminum foil and spray with cooking spray. Take each chicken tender and cover both sides with bread mixture. Place on prepared baking sheet.
Drizzle with a bit of olive oil and bake 35-40 minutes, turning the tenders over at the halfway point. While the chicken is cooking, make the pineapple sauce. In small saucepan combine all sauce ingredients.
Cook over medium heat until bubbly, stirring often.
The sauce comes together very quickly, maybe three or four minutes at the most. Now you're ready to eat. You can serve this hot, cold or room temp. It's delicious any way, I've been dipping all night.
I'm so excited about this sauce because it's not just for dipping. I think it's a great accompaniment to dishes like grilled or baked pork or lamb chops. And it's a nice substitute for apple sauce, and who knows what else?
Tuesday, July 10, 2012
Oven Barbecued Potatoes
This is a recipe I found on The Noble Pig blog that sounded delicious when I read it, and turned out to be super delicious when I made it. It's a great side for just about any entree or a perfect appetizer with a cocktail or glass of wine. The potatoes retain the barbecue flavor but it's not overwhelming. They're creamy on the inside and crisp on the outside, just the way I like them. Plus they're a quick fix. The most time consuming part of the dish is waiting for the oven to pre-heat.
Oven Baked Barbecued Potatoes
Adapted from the Noble Pig
3 medium size potatoes peeled and cut into wedges- I used Maine but Idaho would be fine
1/4 cup barbecue sauce- I used Bull's-Eye Original
2 T olive oil
1/4 tsp black pepper
kosher salt
Cooking spray
1/2 cup low fat sour cream or plain yogurt
2 T barbecue sauce
1/2 scallion chopped for garnish
Pre heat oven to 425 degrees. Prep baking sheet with aluminum foil and dust with cooking spray. In medium size bowl mix together the barbeque sauce, oil and pepper. Add potatoes and toss with oil mixture.
Place sliced potatoes on prepared baking sheet. Bake 15 minutes and rotate pan. Cook another 10 minutes and remove from oven. Sprinkle with salt and let potatoes cool in the pan about 10 minutes before serving. While the potatoes are cooling, make this very cool dipping sauce. Mix low fat sour cream and barbecue sauce, and garnish with chopped scallion. Okay, now it's time to eat.
Sunday, June 24, 2012
Southern Comfort
I'm feeling very southern right about now ya'll. This weekend I made Pimento Cheese, a recipe that Lynn Socko (from Texas) was kind enough to share with the folks on Just a Pinch, the recipe site I've been visiting daily. I have been hearing about this cheese mixture for years. If it wasn't Emeril talking about it on the Food Network, it was Paula Deen, Alton Brown, or any other cook/chef that spent time in the south. I now know what they've all been raving about. I made this over the weekend in no time flat. This cheese spread has it all- it's a little bit sharp and tangy, somewhat sweet from the roasted red pepper, salty from the cheese, utterly creamy, and sinfully decadent. In New England you don't find this dreamy concoction in the grocery stores, so you've got to make it at home. Lynn's recipe is simple (the only taxing part is grating the small amount of onion and jalapeno pepper), and she's been kind enough to cut the fat, carbs, salt and calories for us.
Pimento Cheese
Inspired by Lynn Socko
2 cups grated low fat cheddar cheese
1/2 cup non fat plain Greek yogurt
1-1/2 tsp shaved fresh jalapeno pepper
1-1/2 tsp shaved onion
2 T roasted red pepper- I used Pastene right out of the jar, Lynn roasts her own
1/4 tsp freshly ground black pepper
1 pinch of tumeric
The first thing I did was grate the onion and jalapeno with my kitchen rasp and deposited the pulp from the veggies in a medium sized bowl. Then I added the roasted red pepper.
Next came the yogurt.
And the black pepper and tumeric. I love that Lynn uses terms in her recipes like dashes and pinches. It gives me an opportunity to use this very unusual and unused measuring device I've had in one of my utensil drawers for years. Anybody else come across these spoons?
Now add the cheese. Mix well and serve on sandwiches, as a dip with chips or veggies, or do what I did and grill up some artisan bread for bruschetas topped with a little southern comfort. Y'all will be very satisfied.
Thanks Lynn for sharing a taste of your southern roots. You can access Lynn's blog from my blog roll. She's at Eating and Living to Tell About It.
Wednesday, June 20, 2012
Oven Fried Sweet Potatoes with Sriracha Dip
When I first started this blog I wrote about my obsession with PF Changs' creamy, spicy Sriracha dipping sauce. I've more or less gotten over my obsession but still crave this yummy mayonnaise mixture a few times a month. And lately I've been making it without dragging out the blender (I'm getting lazy in my old age). Anyway, here's a great little appetizer or side dish you might want to try. It's ready in under and hour, and the sauce is almost as good as the original posted three years ago. By the way, Sriracha sauce can be found in the International aisle of most supermarkets. The brand that I buy is from Huy Fong Foods.
Oven Fried Sweet Potatoes
serves two
2 sweet potatoes, washed, peeled and sliced into 24 pieces. I like to cut the potatoes in half, then slice each half into six pieces
2 T canola oil
1/2 tsp kosher salt
1/4 tsp ground ginger
1/4 tsp garlic powder
1/4 onion powder
Creamy Sriracha Dipping Sauce
1/2 cup light mayonnaise
1-1/2 T Sriracha sauce
1 scallion chopped
1/2 tsp horseradish
Pre heat oven to 400 degrees. In large bowl combine canola oil with dry spices. Add the sliced potatoes to the bowl and coat with oil mixture. Place on baking sheet covered with foil or parchment paper. Bake 20 minutes. Turn potatoes over and cook another 15 minutes or until done.
While potatoes are cooking, make the dipping sauce. Combine all ingredients and when potatoes are done, dig in and dip away.
Tuesday, May 29, 2012
Spinach and Artichoke Dip with a Twist
Last week my friend Maryann had a birthday and to help her celebrate, I made what seems to be America's favorite ooey, gooey, munchy, dippy, comfort food- Baked Spinach and Artichoke Dip. I added a little flavor booster that really took the dish to a new level- Roasted Garlic. Plus I lightened the ingredients as much as I could so we can all have a few more helpings. Here are the ingredients and simple instructions to roast the garlic, in case you've never done that before.
Baked Roasted Garlic, Spinach and Artichoke Dip
Roasted Garlic
1 small head of garlic
1 T olive oil
1/2 tsp coarse sea salt
1/4 tsp ground black pepper
The Dip
8 oz neufchatel cheese (lower fat cream cheese) softened to room temp
1/3 cup grated Parmesan cheese
1/3 cup reduced fat shredded Mozzarella cheese
1/3 cup lite sour cream
1/3 cup lite mayonnaise
10 oz package of frozen chopped spinach thawed or defrosted in the microwave, then squeezed dry to remove any liquid
1 can artichoke hearts, drained and chopped (any size can will work)
1 head of roasted garlic
1/4 tsp kosher salt
1 tsp hot sauce
To roast the garlic: Pre heat oven to 400 degrees. Place a baking sheet in the oven as it pre heats. Remove some of the outer layers of the garlic skin if they are plentiful. Cut the top off the head of the garlic and place on a piece of aluminum foil. Drizzle with olive oil and sprinkle with sea salt and pepper.
Seal the foil and place on pre-heated baking sheet. Roast 30-40 minutes. Allow to cool slightly and squeeze the roasted pulp into your mixing bowl (discard the skin). Doesn't that garlic look perfect?
To make the dip: Pre heat oven to 350 degrees. Combine all ingredients in a large bowl using a rubber spatula or sturdy spoon. When well mixed, spread into baking dish that's been prepared with cooking spray. Maryann's was baked in a medium sized gratin pan, and mine was done in a small (individual) ramekin. If you want a cheesy top, sprinkle a little more Parmesan cheese over the mixture. Bake 35 minutes and serve with pita chips, grilled Italian bread or raw veggies.
Re-mix: This is a very smooth dip, so if you want a bit of a surprise crunch, add a small can of diced water chestnuts to the mixture (I've done that before). Another thought I had was adding carmalized onions instead of the garlic to the mix. I will try this and post an addendum to this recipe if the onions are as sweet with this combo as I think they will be. I'll be making this all summer and serving it with raw vegetables (zucchini, summer squash and radishes) and any artisan bread I come across. Hope you'll give this a try!
Baked Roasted Garlic, Spinach and Artichoke Dip
Roasted Garlic
1 small head of garlic
1 T olive oil
1/2 tsp coarse sea salt
1/4 tsp ground black pepper
The Dip
8 oz neufchatel cheese (lower fat cream cheese) softened to room temp
1/3 cup grated Parmesan cheese
1/3 cup reduced fat shredded Mozzarella cheese
1/3 cup lite sour cream
1/3 cup lite mayonnaise
10 oz package of frozen chopped spinach thawed or defrosted in the microwave, then squeezed dry to remove any liquid
1 can artichoke hearts, drained and chopped (any size can will work)
1 head of roasted garlic
1/4 tsp kosher salt
1 tsp hot sauce
To roast the garlic: Pre heat oven to 400 degrees. Place a baking sheet in the oven as it pre heats. Remove some of the outer layers of the garlic skin if they are plentiful. Cut the top off the head of the garlic and place on a piece of aluminum foil. Drizzle with olive oil and sprinkle with sea salt and pepper.
Seal the foil and place on pre-heated baking sheet. Roast 30-40 minutes. Allow to cool slightly and squeeze the roasted pulp into your mixing bowl (discard the skin). Doesn't that garlic look perfect?
To make the dip: Pre heat oven to 350 degrees. Combine all ingredients in a large bowl using a rubber spatula or sturdy spoon. When well mixed, spread into baking dish that's been prepared with cooking spray. Maryann's was baked in a medium sized gratin pan, and mine was done in a small (individual) ramekin. If you want a cheesy top, sprinkle a little more Parmesan cheese over the mixture. Bake 35 minutes and serve with pita chips, grilled Italian bread or raw veggies.
Re-mix: This is a very smooth dip, so if you want a bit of a surprise crunch, add a small can of diced water chestnuts to the mixture (I've done that before). Another thought I had was adding carmalized onions instead of the garlic to the mix. I will try this and post an addendum to this recipe if the onions are as sweet with this combo as I think they will be. I'll be making this all summer and serving it with raw vegetables (zucchini, summer squash and radishes) and any artisan bread I come across. Hope you'll give this a try!
Tuesday, September 20, 2011
Avocado Salad Dressing and Dip
1 scallion chopped
1 garlic clove chopped
6 oz plain fat free Greek yogurt (I think sour cream would work well too)
1/2 cup light mayonnaise
2 tsp Worcestershire sauce
Juice of 1 lemon
1/2 tsp tabasco sauce
1/2 tsp kosher salt
black pepper
2 avocados peeled and chopped
Combine all ingredients in blender except the avocadoes. When mixture is smooth, add the first avocado and blend. Your dressing is basically done. Remove from blender and carefully stir in the second avocado. You now have a chunky, decadent dressing with good size chunks of this heavenly fruit that will make every bite of your salad or dip more exciting.
2 cups chopped Romaine lettuce
1 cup chopped baby spinach
4 strips turkey bacon cooked and chopped
2 eggs hard boiled and chopped
3/4 cup croutons (I love home made-Ann Burrell's recipe)
Combine all salad ingredients, toss with dressing and dig in. You won't be disappointed. This salad should serve two. You will have some left over dressing so get creative and slather it on sandwiches, bring out the pita chips, or mix it with some rotisserie chicken, celery and carrots for a very tasty chicken salad. Use it up though, since I don't think it will last more than a day or two.
Sunday, August 22, 2010
California Road Trip: Food and Scenery
I just returned from another fabulous trip to Southern California. This time Lori and I began our adventure in Marina Del Rey and Santa Monica.

We then headed south to San Diego and west to Coronado Bay to enjoy the scenery and magnificent sunsets, not to mention the long awaited late afternoon and dinner reunion with 2 of my favorite cousins Peter and Jane in their fabulous (I want to live there) town of Ocean Beach.


A while ago I came up with an avocado cream cheese spread that works beautifully on toasted or grilled bruscetta. Or as a dip for chips or raw veggies and a sandwich spread (instead of mayo or mustard or ketchup).
Avocado Cream Cheese Spread
Serve on 1 loaf (1 lb) French baguette sliced and toasted
1 avocado sliced
1 tsp Dijon mjustard
Juice of one lemon
8 oz pkg Philadelphia reduced fat cream cheese softened to room temp
2 cloves garlic chopped
1/2 tsp kosher salt
1/4 tsp freshly ground black pepper
Garnish
1/4 cup fresh tomatoes small dice
1/4 cup red onion small dice or substitute 2 T fresh chives chopped
Put all ingredients (except garnish) in food processor or blender and mix until combined. Refrigerate an hour or two to let the mixture set up and the flavors meld. Meanwhile chop garnish ingredients and set aside. Top toasted bruscetta with avocado spread and garnish with 1/2 tsp of tomato mixture.

Now let's tackle the sandwich spread I mentioned a minute ago. The sandwich I love with this spread I call an ABLT: Avocado Spread, Bacon, Lettuce and Tomato. Omit the mayo you usually slather on since you're getting a lot more flavor from the avocado spread. Avocado tastes great with bacon. And tomato. And lettuce. And bread. And remember there's some cheese in this spread which also tastes great with all of the above. And if you want to really take it over the top, sprinkle on some crumbled blue cheese, which ALSO tastes great with everything on this sandwich. I can go on and on about the use of avocados and cheese, but it's late and I'm once again on east coast time. So for now, goodnight and enjoy!
We then headed south to San Diego and west to Coronado Bay to enjoy the scenery and magnificent sunsets, not to mention the long awaited late afternoon and dinner reunion with 2 of my favorite cousins Peter and Jane in their fabulous (I want to live there) town of Ocean Beach.
And then we were off to Murrietta Hot Springs (slightly north and most definately east of San Diego) to the desert and valley of the SoCal wine country where we took in the surrounding mountains and experienced the pleasant, dry heat of the dessert. We enjoyed another reunion with extra-special friends we hadn't seen in over 15 years, dining outdoors at Ponte winery. We indulged in Ponte wine, great conversation, belly laughs and tears (mostly mine), fabulous food and a marvelous fine-mist spritzing devise that kept us cool in the desert heat. Heavenly. Just heavenly.
But this is a cooking blog right? So let's get down to business. I'd like to talk about the one constant I experienced at just about every meal I enjoyed- the Avocado. It first appeared in a guacamole as a garnish in some fish tacos I ate (at 2 separate times), then in a vinaigrette on my lobster and crab cobb salad and later as an olive oil infused dipping sauce for the freshly baked bread at the winery. This is some versatile fruit I'm talking about. So when I got home I pulled out my food benefits chart and checked out what this baby has to offer. So after you read the next sentence, fasten your seat belts and run right out and get yourself some of this healthy goodness. Here are the benefits: Avocados battle diabetes, lower cholesterol, help stop strokes, control blood pressure and smooth your skin. Not bad for a bumpy, alien-looking little piece of fruit!
A while ago I came up with an avocado cream cheese spread that works beautifully on toasted or grilled bruscetta. Or as a dip for chips or raw veggies and a sandwich spread (instead of mayo or mustard or ketchup).
Avocado Cream Cheese Spread
Serve on 1 loaf (1 lb) French baguette sliced and toasted
1 avocado sliced
1 tsp Dijon mjustard
Juice of one lemon
8 oz pkg Philadelphia reduced fat cream cheese softened to room temp
2 cloves garlic chopped
1/2 tsp kosher salt
1/4 tsp freshly ground black pepper
Garnish
1/4 cup fresh tomatoes small dice
1/4 cup red onion small dice or substitute 2 T fresh chives chopped
Put all ingredients (except garnish) in food processor or blender and mix until combined. Refrigerate an hour or two to let the mixture set up and the flavors meld. Meanwhile chop garnish ingredients and set aside. Top toasted bruscetta with avocado spread and garnish with 1/2 tsp of tomato mixture.
Now let's tackle the sandwich spread I mentioned a minute ago. The sandwich I love with this spread I call an ABLT: Avocado Spread, Bacon, Lettuce and Tomato. Omit the mayo you usually slather on since you're getting a lot more flavor from the avocado spread. Avocado tastes great with bacon. And tomato. And lettuce. And bread. And remember there's some cheese in this spread which also tastes great with all of the above. And if you want to really take it over the top, sprinkle on some crumbled blue cheese, which ALSO tastes great with everything on this sandwich. I can go on and on about the use of avocados and cheese, but it's late and I'm once again on east coast time. So for now, goodnight and enjoy!
Friday, June 4, 2010
Spread the Word
Avocado Spread
1 avocado
1 tsp Dijon mustared
Juice of one lemon (3 T)
1/2 tsp salt
1/4 tsp freshly ground black pepper
1/2 cup extra virgin olive oil
2 cloves garlic roughly chopped
Put all ingredients in a blender and whirl away. Refrigerate for a few hours to let the mixture set up.
This was a fun experiment and it lasted for many days in my fridge. Plus it never lost its shocking green color.
Monday, May 17, 2010
Oven Fried with a Dip
I've been playing with Panko and oven frying again and discovered another tasty chicken recipe I'd like to share. I was in the mood for something Asian. And spicy. I thought of different ingredients in the Asian kitchen and needed something that would stand up to the crispiness of the Panko. I opted for sesame seeds. I'm just recently a fan of these little morsels and have been trying them in various recipes lately. So then I thought about adding some heat. I didn't take the cayenne pepper route but decided a good sized helping of Dijon mustard might work. But the best part (as usual) was the dipping sauce that is Asian all the way and can be spiced up as much or as little as you like. And can be re-mixed until your heart's content.
I originally made this recipe with thin cut chicken breasts. I have now been cutting them into 1-1/2 inch slices and calling them fingers. They are great as appetizers, snacks or even a main course. So let's get cooking. As we did last time with Panko, you'll need to set up a dredging station with 3 dishes- one for the flour, one for the egg whites and one for the Panko.
Sesame Chicken Fingers with Asian Dipping Sauce
1 lb chicken breasts sliced lengthwise into 1-1/2 inch strips
1/4 cup AP flour
1/4 tsp kosher salt
1/4 tsp freshly ground black pepper
2 egg whites
2 tsp Dijon mustard
3/4 cup Panko bread flakes
2 T sesame seeds (they can be either toasted or untoasted)
1-1/2 tsp dried minced onion
1/2 tsp freshly ground black pepper
3/4 tsp kosher salt
cooking spray
Dipping Sauce
1/3 cup low sodium soy sauce
1/3 cup rice vinegar
1 tsp toasted sesame oil
1/2 tsp "hot" toasted sesame oil
1/2 scallion white and green parts, sliced 1/4 inch
To make the chicken: Pre heat oven to 450 degrees. Line a baking sheet with aluminum foil. Originally I had been using parchment, but if you don't have the highest quality parchment it begins to brown at about 425 degrees. Foil is safer and cheaper. And I use it now for most of my high temp baking. Anyway, take a wire cooling rack, give it a quick spritz with cooking spray and place it on top of your baking sheet. This is what you'll be cooking your chicken on. Wash chicken, pat dry and set aside.
On to the dredging station. In plate #1 combine flour, 1/4 tsp salt and 1/4 tsp pepper. In plate #2 mix egg whites with mustard and whisk until emulsified. In plate #3 combine Panko, sesame seeds, minced onion, salt and pepper. Now you're ready for the dredge dance. Take your chicken and dredge it in the flour mixture. Shake off any extra flour. Take floured chicken strip and dip in the egg batter. Now dip into the Panko mixture. Make sure Panko mixture completely covers the chicken. Spritz both sides of chicken with cooking spray and place on rack. Continue the dance (I mean the process) until all chicken pieces are coated. Bake in center rack of oven for 12 minutes. Turn chicken over and bake another 8 minutes. Remove from oven.
To make the dipping sauce: While chicken is cooking, combine all ingredients (except scallion slices) in a small jar. Shake until incorporated. Pour into serving dish and garnish with scallions. If you've noticed, I've used 2 different kinds of sesame oil here.
One is very hot, enhanced with chili pepper. One is simply toasted. Use the measurements I've suggested and see if this is the right amount of heat for your taste buds. I'm a pretty spicy gal and this combo works for me. If you want it hotter, dip at your own risk.
Sesame Chicken Fingers with Asian Dipping Sauce
1 lb chicken breasts sliced lengthwise into 1-1/2 inch strips
1/4 cup AP flour
1/4 tsp kosher salt
1/4 tsp freshly ground black pepper
2 egg whites
2 tsp Dijon mustard
3/4 cup Panko bread flakes
2 T sesame seeds (they can be either toasted or untoasted)
1-1/2 tsp dried minced onion
1/2 tsp freshly ground black pepper
3/4 tsp kosher salt
cooking spray
Dipping Sauce
1/3 cup low sodium soy sauce
1/3 cup rice vinegar
1 tsp toasted sesame oil
1/2 tsp "hot" toasted sesame oil
1/2 scallion white and green parts, sliced 1/4 inch
To make the chicken: Pre heat oven to 450 degrees. Line a baking sheet with aluminum foil. Originally I had been using parchment, but if you don't have the highest quality parchment it begins to brown at about 425 degrees. Foil is safer and cheaper. And I use it now for most of my high temp baking. Anyway, take a wire cooling rack, give it a quick spritz with cooking spray and place it on top of your baking sheet. This is what you'll be cooking your chicken on. Wash chicken, pat dry and set aside.
On to the dredging station. In plate #1 combine flour, 1/4 tsp salt and 1/4 tsp pepper. In plate #2 mix egg whites with mustard and whisk until emulsified. In plate #3 combine Panko, sesame seeds, minced onion, salt and pepper. Now you're ready for the dredge dance. Take your chicken and dredge it in the flour mixture. Shake off any extra flour. Take floured chicken strip and dip in the egg batter. Now dip into the Panko mixture. Make sure Panko mixture completely covers the chicken. Spritz both sides of chicken with cooking spray and place on rack. Continue the dance (I mean the process) until all chicken pieces are coated. Bake in center rack of oven for 12 minutes. Turn chicken over and bake another 8 minutes. Remove from oven.
To make the dipping sauce: While chicken is cooking, combine all ingredients (except scallion slices) in a small jar. Shake until incorporated. Pour into serving dish and garnish with scallions. If you've noticed, I've used 2 different kinds of sesame oil here.
How about a dip re-mix? Omit the scallions and add some peeled, thinly sliced ginger and chopped cilantro. Or float some sesame seeds in the dip itself. Carry the hint of mustard into the dip by adding a dollop or two and whisk or shake until emulsified. Not everybody's a fan of hot, so if that's you, use the regular toasted sesame oil and omit the other. And if you prefer a sweeter dip, add some honey. One last idea- (I'm trying not to get carried away), add the honey and the mustard at the same time. Play with some ideas and see what you like best.
Monday, October 19, 2009
Obsession
A few weeks ago my friend and cooking buddy Ruth introduced me to PF Changs. Don't ask me what rock I've been living under for the last ten years, but for some reason this restaurant and I had never had the pleasure to experience one another. And what a pleasure it was. We began with soup, lettuce wraps, pot stickers and tempura green beans (all delish), continued with perfectly seasoned citrus-glazed grilled salmon and finished with chocolate cake (eh) and surprisingly good strawberry cheesecake. A very good meal to say the least. And what was my favorite dish on the table? That small dish of dipping sauce that accompanied the tempura beans. Have you tried this creamy, spicy, magical concoction of loveliness? The concoction that has become an obsession/addiction for me. You see, I took home the leftover beans and sauce and when they were gone I wanted more. Correction, I needed more. Not the beans mind you, but the sauce. I had to have the sauce. While scouring the internet for the recipe I discovered some interesting things:
The prominent ingredient in PF Changs green bean sauce is Sriracha
Sriracha is the generic name for a Thai hot sauce named after the seaside city of Si Racha in the Chonburi province in Thailand
Sriracha sauce has been taking the web and cooking circles by storm
I have indeed been living under a rock
I chose to make this recipe because it used mayonaise which would deliver the creaminess I remembered. Thank you HiHo. And I was pleasantly surprised to find the Sriracha sauce AND the Japanese mayo in my local supermarket. I bought the Sriracha, but the mayo was eight dollars so I figured Helman's would do the trick. I pretty much stuck to HiHo's recipe with a few changes:
Sriracha Mayo Dipping Sauce
3/4 cup Lite mayonaise
2 1/2 T Sriracha chili sauce
1 1/2 T chopped scallions (white ends only)
1 1/2 T chopped garlic
1/2 tsp prepared horseradish
3 T water (or more if you like it thinner)
Combine all ingredients in a blender until smooth. Refrigerate unused portions if there are any. (makes approximately 1 cup)
So, with dip in hand, I began to indulge myself. So far I have feasted on grilled shrimp, avocados, linguini, grilled asparagus, lentil-corn fritters, tuna salad, home made sweet potato chips (you get the picture), all doused or dabbled with my homemade Sriracha Mayo. My favorite? A good old hamburger with lettuce, tomato and a healthy slathering of sauce.
Re-Mix: If you're not a chili fanatic, but like the warmth and flavor that chilis offer, I think you'll enjoy the Sriracha Mayo in these dips. In a blender or food processor combine 1 container (16 oz) of low fat cottage cheese with 6 T Sriracha Mayo and blend until smooth. This makes a delightfully creamy, hint-of-chili cheese spread that's perfect with raw veggies, crackers or chips. OR, if you're not a cheese lover, try 1 container (16 oz) of low fat sour cream mixed with 6 T Sriracha Mayo. Refrigerate for an hour or longer to let it set up, garnish with thinly sliced scallions and dip away!
Now it's your turn. How are you going to tame (or heat up) your Sriracha sauce?
The prominent ingredient in PF Changs green bean sauce is Sriracha
Sriracha is the generic name for a Thai hot sauce named after the seaside city of Si Racha in the Chonburi province in Thailand
Sriracha sauce has been taking the web and cooking circles by storm
I have indeed been living under a rock
I chose to make this recipe because it used mayonaise which would deliver the creaminess I remembered. Thank you HiHo. And I was pleasantly surprised to find the Sriracha sauce AND the Japanese mayo in my local supermarket. I bought the Sriracha, but the mayo was eight dollars so I figured Helman's would do the trick. I pretty much stuck to HiHo's recipe with a few changes:
Sriracha Mayo Dipping Sauce
3/4 cup Lite mayonaise
2 1/2 T Sriracha chili sauce
1 1/2 T chopped scallions (white ends only)
1 1/2 T chopped garlic
1/2 tsp prepared horseradish
3 T water (or more if you like it thinner)
Combine all ingredients in a blender until smooth. Refrigerate unused portions if there are any. (makes approximately 1 cup)
So, with dip in hand, I began to indulge myself. So far I have feasted on grilled shrimp, avocados, linguini, grilled asparagus, lentil-corn fritters, tuna salad, home made sweet potato chips (you get the picture), all doused or dabbled with my homemade Sriracha Mayo. My favorite? A good old hamburger with lettuce, tomato and a healthy slathering of sauce.
Re-Mix: If you're not a chili fanatic, but like the warmth and flavor that chilis offer, I think you'll enjoy the Sriracha Mayo in these dips. In a blender or food processor combine 1 container (16 oz) of low fat cottage cheese with 6 T Sriracha Mayo and blend until smooth. This makes a delightfully creamy, hint-of-chili cheese spread that's perfect with raw veggies, crackers or chips. OR, if you're not a cheese lover, try 1 container (16 oz) of low fat sour cream mixed with 6 T Sriracha Mayo. Refrigerate for an hour or longer to let it set up, garnish with thinly sliced scallions and dip away!
Now it's your turn. How are you going to tame (or heat up) your Sriracha sauce?
Subscribe to:
Posts (Atom)