Showing posts with label breakfast. Show all posts

Monday, August 3, 2015

Banana Bread, Cream Cheese and Strawberry Open Face Sammies


We're in the middle of summer and I've been slacking as far as the blog posts go. My apologies, but I have a lame excuse, I do. There are too many delicious recipes to try and too much time to spend outdoors. Well this long over do post is one that is delish and truly not my own creation. It's a compilation of a few great bloggers out there and let's give credit where credit is due. The sour cream banana bread comes from Courtney at Neighborfoodblog.com and the strawberry sauce/compote comes from Christine who got the recipe from Aunt Missy's Kitchen.

I love a creamy banana bread and Courney hit the nail on the head with this one. Here's her recipe (with one minor change from me):

Sour Cream Banana Bread
8 slices

½ cup (1 stick) butter, softened (Courtney melted her butter)
½ cup brown sugar
½ cup white sugar
½ cup sour cream
2 eggs
1 teaspoon vanilla
3 large very ripe bananas
1½ cups flour
1 teaspoon. baking soda
½ teaspoon baking powder
½ teaspoon salt
1 teaspoon cinnamon
 
Grease an 8 inch bread pan with butter or cooking spray.  Preheat the oven to 350 degrees.
 
In a large mixing bowl, combine the softened butter, brown sugar, and white sugar. I used my hand mixer for this stage and mixed ingredients together until smooth and no brown sugar lumps remained. Put your mixer away and whisk in the sour cream, add the eggs, one at a time, whisking well after each addition. Stir in the vanilla.
 
In a separate bowl, mash the bananas then whisk them into the sour cream/egg mixture.
 
Sprinkle the flour, baking soda, baking powder, salt, and cinnamon on top then stir it together until flour is incorporated. Pour the batter into the prepared loaf pan and bake for 50 minutes or until a toothpick inserted in the center comes out with just a few moist crumbs. Check the pan after about 30 minutes. If the top is getting too browned, cover with foil for the remaining baking time. I didn't have to do that the two times I made this bread.  Allow the bread to cool before removing from the pan. Wrap leftovers in saran wrap. Bread will keep for up to a week. (Mine is gobbled up in a matter of days)
 
 
Now how about some strawberries to top this moist, delicious bread? Sounds good to me!

Homemade Strawberry Sauce

12 oz fresh strawberries rinsed and hulled
3/4 cups sugar
1 tsp butter
Pinch of salt
Juice of 1 lemon (Missy uses 1/2 a lemon)
2 level teaspoons cornstarch
1 T cool water

In medium saucepan combine half the berries, sugar, butter, lemon juice and salt. Bring to a gentle simmer over medium low heat for about 7 minutes, stirring a few times to make sure the sugar is dissolved and the mixture doesn't stick to the pan. (If you forget the butter, as I did the first time I made this, the mixture WILL stick to the pan, but the easy solution is to add the butter as soon as you realize you forgot it and you should be all right). In a separate small bowl, combine cornstarch and water and stir until smooth. Pour the cornstarch slurry into the strawberry mixture and stir. Allow berries to bubble and simmer for another minute or two and remove from heat. Add the remainder of the strawberries. Cool and refrigerate for later.


As Missy says, "this makes a great sauce for cheesecake, ice cream, pancakes, French Toast etc". I took the etcetera route and made a decadent breakfast/brunch entrée or side. Open Faced Banana Bread, Cream Cheese and Strawberry Sandwiches. Yummy delish, that's all I can say. Thanks fellow bloggers for all your inspiration!
 
 
And a few days later, I came up with this idea for easy portability. Three layer banana bread with all the fixings.


Thursday, June 4, 2015

A Berry Good Baked Pancake


Some of you may have seen the King Arthur baked pancake post on face book the other day. This is the link I saw. Blueberry pancakes cooked in the oven. Brilliant!! But does it work? I'm happy to say in capital letters, "YES, YES it does". Great for breakfast, brunch, dinner or anytime. I had 12 ounces of fresh raspberries and thought I'd go for it. I think this recipe should feed 6 people, but after my two helpings I snuck in a third one. So plan on a meal for 4, just saying... So simple and ready in a half hour.

King Arthur Inspired Baked Raspberry Pancakes
Serves 4

1 T unsalted butter for greasing a 9" x 13" pan (I used a glass dish)
2 cups Bisquick original pancake/baking mix (any pancake mix will do, or from scratch)
2 eggs
1 cup milk (I used 2%)
12 oz fresh raspberries divided

1/2 cup confectioner's sugar
1 tsp maple extract
Approximately 1/4 cup milk
dash of salt

Pre heat oven to 350 degrees. Grease your pan with butter. Set aside and make your pancake batter according to package directions. Add in 6 ounces of the fresh raspberries and pour into baking dish. Place on middle rack in oven. Set timer for 35 minutes.


While the pancakes are cooking make the glaze. With whisk, combine the confectioner's sugar, maple extract and 1/4 cup of milk (or even less, depending how thick you like your glaze). Set aside and wait for pancakes to come out of the oven.


When pancakes are done (test them as you would a cake, with a toothpick) set aside and let cool a bit. When warm and not too hot anymore, brush with at least half the glaze. Slice into 12 squares, garnish with the additional berries and drizzle on some more of that decadent glaze.


Since this was a test recipe for me, I pretty much followed King Arthur's directions to the letter. I'm thinking next time a little orange or lemon zest would be a happy addition to the batter. And call me crazy, but even some mini chocolate chips in the batter would work nicely, with a small little squirt of chocolate sauce on the side. Thanks King Arthur, I'm a happy gal tonight.

Monday, April 13, 2015

Caramalized Onion, Bacon, Cheese and Baby Kale Strata


Before I say good bye to winter, I must share my latest strata (last of the comfort food hopefully?). Remember, I live in New England and while a lot of the country has been enjoying comfortable temperatures, I made this dish 3 days ago when it was hailing on my way home from work. It's a simple fix, and I know you're going to like the caramelized onion/cheese/bacon/kale combo. Oh and the little tang of Dijon mustard is just perfect. Here's what you need to put this little darling together, and you don't have to be having a tough winter to make this, it's a great brunch entrée- hot out of the oven or served at room temp.

End of the Winter Strata
Serves 6

6 slices bacon chopped 1 inch pieces
1 T olive oil
2 medium sized onions chopped
1/2 cup Fontina cheese shredded
1/2 cup Gorgonzola cheese crumbled
3/4 cup baby kale chopped
8 slices hearty white or Italian bread cut into 1 inch cubes
4 large eggs
1-3/4 cups milk or half and half
1 T Dijon mustard
1/2 tsp kosher salt
1/4 tsp black pepper
2 T unsalted butter melted

Let's do this with pictures. It will help me next year when I'm at my wit's end with cold weather. Yes, that might help!

Sauté bacon in a large pan.

 
When just about crisp, remove from pan and drain on paper towel. Save 1 T of bacon fat and place back in pan and add 1 T of olive oil. Add your onions and cook on low heat for at least 20-30 minutes.


Add a little salt and pepper if you like. I did. While onions are caramelizing, shred your Fontina cheese and crumble the Gorganzola. Now chop your baby kale, slice your bread, melt butter and prepare your egg custard. In mixing bowl or large measuring cup mix eggs, milk, mustard, salt, pepper and cooled melted butter.

Prepare an 8" x 8' baking dish with cooking spray and layer 4 of the sliced pieces of bread.


Add your cooked bacon, caramelized onions, cheese and kale.


Top with the rest of the sliced bread and add the egg custard. Cover with plastic wrap and let sit for about an hour.


Since I've been making strata's all winter, I've been reading up on the "setting-up in the fridge" time of this lovely dish, and I am of the belief that 1 -2 hours is all you need. Some say overnight. Sorry- I don't have time for that, and also...I don't think it bakes as well. Yeah, I'm a rebel. But try it my way, I think you'll be happy. So put this little dish of deliciousness in a 325 degree oven and bake for 50-55 minutes. Oh, you can also add a bit more cheese to the top. It is a farewell to winter right? Take a look. Imagine how good it tastes.

Sunday, February 8, 2015

Make Yourself Comfortable


Craving comfort food? I sure am. This little gem managed to get me out of the bad mood I've been in due to the constant snow that has invaded New England for 2-1/2 weeks. Oh yes, 2 or 3 more days of shoveling, salting, are sanding are in the forecast, not to mention an additional 12 to 15 inches of the white stuff. When we have a snowy winter like this one, I always try to keep bread, eggs, cheese, cream and butter in the house.  One of the reasons is so that I have an excuse to comfort myself with this decadent strata. It's great right out of the oven, and almost as good at room temp. Here's the recipe.

Ham and Cheese Strata
Serves 9

Cooking spray
2 T unsalted butter
8 slices hearty white bread cubed 1" pieces
2 cups grated sharp cheddar cheese
4 oz honey ham sliced 1" pieces
2 scallions chopped
5 large eggs
1-3/4 cups fat free half and half
1/8 tsp cayenne pepper
1 tsp kosher salt
1/4 tsp black pepper

Ready to assemble this cheesy, buttery, savory concoction? I sure am.


Spray an 8" x 8" baking dish and set aside. On stovetop on low, melt butter in small saucepan and remove to cool. Place half the bread cubes on top of the sprayed baking dish.


Sprinkle with 1-1/2 cups of cheese. Top with all the ham and chopped scallions. Add the rest of the cubed bread and the remaining cheese.


Set the baking dish aside and make the custard: Whisk together eggs, half and half, melted butter, cayenne pepper, salt and pepper. Pour this liquid gold over your ham, cheese and bread mixture.


Cover with plastic wrap and refrigerate for about 2 hours (or longer shouldn't hurt), letting the custard soak into all the elements of the dish. About an hour before you're ready to bake, remove dish from fridge and let come to room temperature.

Pre heat oven to 325 degrees. Bake 50-60 minutes in middle rack on oven. All ovens are different, so start checking for brown-ness at about 40 minutes. Remove from oven, let rest about 10 minutes before serving. I slice into 9 squares. Doesn't that look comforting?


There are so many ways to re-mix this recipe...add some Dijon mustard to the custard. Place a layer of roasted red peppers or softened sun dried tomatoes on the ham and cheese. Of course some chopped, cooked bacon would be heavenly as well. One of my favorites is blue cheese and caramelized onions. You can even make this on a sweet note, with cottage cheese, raisins and cinnamon. There are so many ways to make yourself comfortable, I suggest you give a strata a try!

Monday, April 28, 2014

French Toast with Strawberry Syrup


I don't think I've made French Toast in at least 20 or maybe even 30 years. My friend Lynn was talking about it on facebook today and I jumped on that bandwagon and pleased myself like you wouldn't believe. If you ever have a night where you can't decide what to cook, this is a direction you should explore. So easy and quick. Oh, and inexpensive. Get ready, you'll be eating in 20 minutes.

Strawberry Syrup/Sauce
Enough for 4 slices of French toast

8-10 oz fresh strawberries sliced
1/4 cup water
1 T Splenda or sugar
1/2 lemon squeezed

French Toast
4 slices

3 large eggs
1 tsp vanilla extract
Pinch of salt
2 tsp half and half
4 slices sturdy white bread
2 T butter
1-2 T canola oil

Powdered sugar for garnish

Slice your strawberries. Put them in a saucepan with water and Splenda (or sugar). Bring to a low boil and cook for 10 to 15 minutes. Add the lemon juice right before you remove it from the stovetop.


While strawberry syrup is cooking, prepare the batter for your toast. Combine eggs, salt, vanilla and half and half.  Soak bread for a few minutes until it becomes a bit egg-laden and heavy.


The bread I used tonight was Pepperidge Farm Farmhouse Hearty White. It's sturdy enough to hold up to the egg soaking procedure. Heat a large skillet and add butter and canola. On medium to low heat add your bread and cook about 3 minutes on each side until toasy and brown.


Plate and serve with a dusting of powdered sugar and your quick homemade strawberry syrup. Yummy, economical and oh so comforting.

Friday, November 29, 2013

Berry Nice Banana Bread


I do a lot of shopping before Thanksgiving and sometimes I just don't get to make everything I have planned. This year I knew I was not going to get to the big fruit salad and decided to nip the guilt of "wasting food" right in the bud. I had 3 super ripe bananas sitting on the counter, not to mention the abundance of cranberries in my fridge and decided to make a breakfast bread that my friend Carol posted on Just a Pinch. It's super simple and a great way to get a little nutrition into your body before you start cooking your Thanksgiving feast. Here we go, it's a quick bread and I know you'll be quick to make this recipe.

Cranberry Banana Bread
makes one loaf in a medium to large loaf pan

1 cup Splenda no calorie sweetener (of course you can use regular sugar)
1/2 tsp salt
1/2 cup butter softened to room temp
3 very ripe bananas mashed
2 large eggs beaten
1 tsp baking soda
2 c AP flour
1/2 c walnuts finely chopped
1 cup cranberries roughly chopped

Pre heat oven to 325 degrees. Prepare loaf pan with cooking spray.

In medium size bowl mix flour, salt and baking soda. I use a whisk for this but Carol sifts her dry ingredients. I'm a bit lazy, and it didn't seem to matter. Set aside for the time being.

In large bowl cream your Splenda and butter with hand mixer for about 3 minutes. When it looks nice and smooth, add your eggs and bananas and combine.


This is when the mixture stops looking smooth and attractive. It takes on an aura of being curdled. Forge on because it will redeem itself. Add the dry mixture into the curdled mixture and stir with a large wooden spoon. From what I know about making quick breads, the less you fuss with it, the better the results. So you've mixed the batter and it's still not looking great? Me too. Grab that hand mixer and finish the job, that's what I did. Four or five whirls around the bowl and you've got a nice batter. Time to add the cranberries and walnuts.

 
Use your wooden spoon again and and combine all ingredients. Pour into your loaf pan and bake 55 minutes to one hour. You can tell when it's done because the aroma in your kitchen is calling you. Remove from oven.


Place on wire cooling rack for about 20 minutes or a half hour. Remove from pan and let cool completely.


It was so late when I baked this, that I waited until morning to dig in. But dig in I did, to this energy and flavor boost all at once.

 
You know I treated myself to nice little shmear of cream cheese on top of this yummy pre-Thanksgiving snack/breakfast. I promise, you will be berry happy with this one! Don't forget the cream cheese and since we're celebrating, how about a spoonful of honey too?  

Monday, March 11, 2013

Tortilla and Egg Bake


I was doing a bit of experimenting last night. I love to cook ahead and then reheat because it just makes my life so much easier. And I was curious if eggs baked in tortilla shells would stand up to the reheating process of nuking at the office. I have a large muffin pan that contains 6 muffin holes that measure 4 inches in diameter that I used to use for mini quiches. I pulled this rarely used dinosaur out of the cupbaord and got to work. I had 4 six inch corn tortillas on hand, warmed them a few seconds in the microwave and nestled them inside four of the round indentations that were misted lightly with cooking spray.


They seemed to fit okay, so I proceded to sautee a few veggies in canola oil that I thought would go well with the tortillas and eggs. I used 1/2 a red pepper chopped, 1 small onion chopped, 1 jalapeno pepper chopped, 1/4 cup or so of black beans and some spices: salt, pepper, and 1/4 tsp each of cumin and chili powder.


I added this aromatic mixture to the bottom of the tortillas, and topped each with about a tsp of store bought salsa. So far so good. At this point I pre heated the oven to 425 degrees.


How could I make any Tex-Mex dish without adding cheese? Had to do it, so I added as much shredded sharp cheddar as I could fit in, still leaving room for the eggs.


I added a splash of half and half, some salt and pepper and topped each tortilla with a few extra black beans and baked them for 12 minutes which seemed to be the perfect time. The eggs were still soft, the tortillas were crispy and the insides were hot. After they cooled a bit I wrapped them up, put them in the fridge excited for the morning experiment.


I did not bring my camera to work so I do not have a picture of the re-heated, microwaved egg tortilla, and I must say, for once- one of my experiments actually worked on the first try. The tortilla stayed crisp, the egg was still soft and the inside veggies were warm and delicious. If I weren't eating this on the run at work I would have garnished with sour cream, a little more salsa, more cheese of course and cilantro leaves. Give this a try and get even more creative than I was. The possibilities are endless.

Friday, December 28, 2012

Melissa's French Eggs


On Friday night I never plan an elaborate dinner. It's the end of the work week and I just like to let the chips fall and see what's leftover in the fridge or throw a quick sandwich together. So wasn't I delighted to read Melissa's blog post today for the simplest and most heavenly baked egg dish ever. She makes her eggs in a muffin pan. I still don't have one so used my new square "whatchmacallit" pan and the dish was great. I added spinach because I had some, and was very happy with the results. If you're looking for a quick breakfast, lunch or dinner, here it is.

Baked Eggs
Makes 2 servings

4 large eggs
1/4-1/3 cup fresh baby spinach
1/4 cup grated parmesan cheese
salt and pepper

Pre heat oven to 425 degrees and mist muffin pan with cooking spray. Melissa uses butter flavored spray, but I didn't have any so just used the regular canola. Add spinach to 4 of the cups.


Now crack an egg into each cup and sprinkle with salt and pepper.


Top with parmesan cheese (or any cheese that you like with eggs). These are looking great already.


Bake for 9 minutes and serve on toast. I enjoyed mine on a slice of Arnold Sandwich Thins. Yummy delish! I could have eaten all 4 eggs but contained myself. I'm saving the other two for sometime over the weekend. Then I will nuke them for a minute, and enjoy the meal all over again.


Thanks Melissa, another fabulous recipe that tastes as good as it looks. You rock, fellow blogger!


Saturday, June 25, 2011

Berrylicious

Courtney, this recipe is for you! It's a re-mix of the blueberry cake you enjoyed two years ago which I'm finally getting around to posting. It has the right amount of sour cream and non-fat half and half which makes it tender and moist. And it's pretty easy to make. Here's the recipe.

Blueberry Coffee Cake

Topping (Crumble)
1/4 cup rolled oats
1/4 cup AP flour
2 T unsalted butter
2T canola oil
1/4 cup Splenda no calorie sweetener (granulated sugar works fine too)
1 tsp ground cinnamon
1/4 tsp salt

Dry Ingredients
1-1/2 cups AP flour
2 tsp baking powder
1/2 tsp salt

Wet Ingredients
6 T unsalted butter softened
2 T canola oil
1 cup Splenda no calorie sweetener (or sugar)
1/4 cup fat free half and half
1/2 cup light sour cream
2 large eggs
1 tsp vanilla extract
1 pint blueberries, washed and patted dry

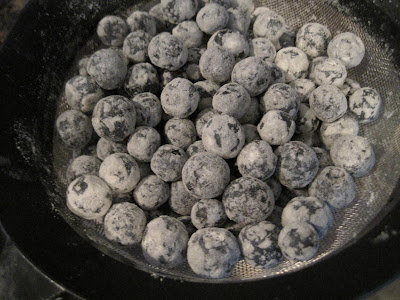
Pre heat oven to 350 degrees. Prepare an 8" x 8" pan with cooking spray and dust lightly with flour. I like the disposable aluminum pans from the grocery store. Place blueberries in a strainer and sprinkle with a tablespoon of flour. Shake out excess flour. This coating will prevent the blueberries from sinking to the bottom of the cake. Set the berries aside.


I like to prepare the topping first. In small bowl combine all crumble ingredients and set aside.

Now on to the cake. In mid size bowl combine the dry ingredients and whip with a whisk to incorporate.

In large bowl, with hand mixer combine butter, canola oil and Splenda and mix until smooth, about 2 minutes. Add eggs one at a time and mix, then vanilla, sour cream and half and half. Combine well. Add the dry ingredients in two batches, scraping down the sides of your bowl as you go and mix until smooth. Fold in blueberries and pour batter into prepared pan. Sprinkle the topping on the cake and press down lightly with your clean hands to make it stick to the batter. Bake 35 to 45 minutes and remove to cooling rack. Let cool at least 30 minutes before you dig in.

Slice into 9 portions and enjoy. I can't think of a better way to kick off the summer fruit season!

Re-mix: If you're feeling nutty, add some chopped walnuts to the batter (1/2 cup). And if that isn't enough nuts for you, add 2 tablespoons to the topping. Also, I have made this recipe with fresh peaches as the star and some haphazard blueberries thrown into the mix and it's also quite good. Tip- If you want to make this with frozen blueberries, don't defrost them or your batter has the chance of turning blue.