Showing posts with label make ahead. Show all posts
Tuesday, November 18, 2014
Flavor Explosion
A few weeks ago at our pot luck Halloween lunch at work I sampled kielbasa cooked in yellow mustard and apple jelly. It was served on toothpicks as an appetizer. And wow, was it good. So last week I took this yummy idea a step further and made a soup with kielbasa, cabbage, onions and potatoes. And cooked them in the mustard and apple jelly mixture. Flavor explosion is all I can say. And easy peasy.
Kielbasa and Cabbage Soup
serves 4
1 package kielbasa (I used the light)
1/2 head green cabbage sliced or chopped
1 large onion sliced
1/2 tsp mustard seeds
2 tsp canola oil
water to cover kielbasa
2 cups chicken broth
1 Russet potato diced
9 oz apple jelly
4 oz yellow mustard
salt and pepper
Let's get cooking. Slice your kielbasa so it fits in a medium size sauce pan. Cover with water and cook on medium heat until the sausages begin to plump, about 25 minutes.
Prep your cabbage and onions and set aside. Remove kielbasa from pan and let cool. Reserve 1 cup of the cooking liquid for broth. When kielbasa is cooled a bit slice into 1/2 inch rounds and mix together the mustard and apple jelly.
In large soup pan on medium heat, add canola oil and toast the mustard seeds for almost a minute, until they start to pop. Now add the cabbage and onions and lower heat to medium low. Cook cabbage/onions until slightly wilted.
Now add the apple jelly mixture and reserved cooking water and chicken broth. Add back the kielbasa and the chopped potatoes. Cook another ten minutes and your soup is done. Taste to see if you need to add any salt and pepper. I added a pinch or two of both.
This is one hearty meal, and the combo of the apple jelly and mustard just takes it over the top. It's a little bit sweet and has just the right amount of tang due to the mustard. Yummers, I'm going to try this again and add a little bit of bacon. And next time, you can be sure I'll have a crusty loaf of bread on hand for dipping. Oh yeah, I'm getting ready for winter.
Tuesday, November 11, 2014
Thai Inspired Red Curry Satay Chicken Soup
I can't get enough of the Thai flavors. The red chilis, lemongrass, peanuts and coconut milk to name a few. You name it- I'm hooked. Last night's dinner was simple to make and fabulous to slurp. And served with Jasmine rice, well it was over the top delish. Want to make this? I can't wait to re-live putting this simple dish together. And don't let the long ingredient list stop you from making this. It's mostly a "can opener" experience and very little prep. Let's get going.
Red Curry Satay Chicken Soup
Serves 4
1-1/2 to 2 pounds bone-in chicken breast or breasts with skin removed
Kosher salt
1 T canola oil
1 small onion diced
2 T Thai red curry paste (I use Thai Kitchen)
2 cloves garlic chopped
1 can (14 oz) lite unsweetened coconut milk
1-1/2 cups water or chicken broth (I used water)
1-1/2 T fish sauce
2 T brown sugar
1/2 cup Thai Kitchen Peanut Satay Sauce (easy to find in international aisle of your market)
1-1/2 T chili garlic sauce
1 red pepper sliced
1/2 cup frozen peas
1/2 cup frozen corn
Juice of one lemon or lime (I used a lemon, no lime in the fridge)
chopped dry roated peanuts for garnish
scallion slices for garnish
Fresno chilis sliced for garnish
Clean and wash your chicken breasts. I had a breast in my package that was soooo big, I ended up just using the one. It was about 1-3/4 pounds. Remove skin, sprinkle with kosher salt and set aside.
In large soup pot on stovetop, add canola oil and heat on medium to low heat. Add onions and sweat for about 3-4 minutes. Now add your chopped garlic and red curry paste.
Let aromatics cook for a few more minutes on low until you can smell the chili and lemongrass in the paste. It's now time to add the coconut milk, water, fish sauce, brown sugar, peanut satay sauce, and chili garlic sauce. Stir together with a spatula to combine and add your chicken breast(s).
Well, I had a nice photo array of the chicken cooking, veggies being added and it seems that my photos are no longer compatible with my blog. So, trooper that I am, I'm finishing the post without anymore new pics. Grrrrrrrrr. That's directed at you Google.
Anyway, cook chicken on low, covered, until done. Don't over cook it. My whopper breast cooked for 36 minutes on low/simmer and rested for about 10-15 minutes until I could handle it and shred it.
While chicken is resting, slice your red pepper in strips, prepare your garnishes and make your Jasmine rice in a separate pan. I'm not a great rice cooker so I use the Success brand Jasmine rice. Ready in 9 minutes.
Add shredded chicken to soup, add sliced red pepper and let them cook together 10-15 minutes. Now add the peas and corn. Cook about another minute and add the juice of one lemon or lime. When plating, I put a dome of rice in the center of each bowl and added the soup around the edges. You see, sometimes I just enjoy a mouthful of rice with very little broth and sometimes I like it nicely mixed. This way you can do both. Garnish with scallions, Serano chilis and crushed roasted peanuts. Cilantro would be a natural, but there was none available in my market. I hope you enjoy this. I had a taste tonight before writing and it's just as good if not better than yesterday. And look at that fabulous color. A very happy meal I must say!
Sunday, August 10, 2014
Citrus Orzo Salad Re-Mixed
I love the last orzo salad recipe I posted. It was tasty. And sweet. And salty. And right up my alley. But there are a lot of folks out there that are not wild about capers, olives and raisins. So I did some experimenting this weekend and came up with a more conventional version. Well, I shouldn't put it that way, because there is nothing conventional about candied walnuts in an orzo salad. Plus I amped up the amount of sweet navel oranges, added more crunch with the addition of celery, and swapped out the creamy goat cheese for some extra tangy Gorgonzola. Serve this on a big platter or make up individual Bibb lettuce cups. It is a crowd pleaser!
Citrus Orzo Salad with Candied Walnuts
1 T unsalted butter
1 T olive oil
1 large onion diced
Kosher salt
Pepper
1 cup uncooked orzo
Additional salt and pepper
1-3/4 cups water
4 scallions chopped
4 navel oranges supremed
2 stalks celery chopped
4 oz crumbled Gorgonzola cheese
1/4 cup cilantro chopped
1 cup walnuts
3 T sugar
1 T unsalted butter
Salad Dressing:
1 clove garlic finely chopped
Juice of 2 lemons
1 T rice vinegar
Liquid from supremed oranges
Extra Virgin Olive Oil
1 tsp Dijon mustard
To make the orzo: (This is my mom's method, and it is no fail). In medium size saucepan on medium low heat, melt your butter and olive oil. Add the chopped onions and some salt and pepper. Cook uncovered on stovetop to soften the onions, not brown them. After about 5 minutes they will be translucent and ready to accept the orzo. Add the cup of orzo and coat with the buttery onions. Add a bit more salt and pepper (the orzo has absolutely no flavor if you do not season it). Stir to combine onions and orzo and let the orzo toast a bit (2-3 minutes). Add water and bring to a boil. Cover, reduce heat to the lowest simmer and cook 12-13 minutes. The orzo will still be a bit watery, but keep covered off the heat and all the liquid will evaporate.
While orzo is cooling, let's candy the walnuts. In large saucepan on medium heat add the sugar and butter. Mix to combine. Now add the nuts and coat them with the sugary liquid. Toast the mixture for about 3 minutes (that's all the time it takes). Just make sure to keep an eye on the walnuts so they don't burn.
As soon as the nuts are sweet and toasty, transfer them to a piece of parchment paper and separate them the best you can. You do not want clumps of nuts on top of your salad. Set them aside to cool.
To make the dressing: Combine all ingredients in a medium size jar and shake. Or just whisk everything together until it emulsifies.
Assembly: In large bowl combine scallions, orange supremes, celery, and cilantro.
Now add your Gorgonzola and cooled orzo.
If I'm making this dish ahead, I dress the salad with only half the dressing, cover with plastic wrap and refrigerate. Then I dress it again right before serving time. By the way, I like this salad served at room temp, but it is still delish served cold. And don't forget, liberally sprinkle those sweet, toasty walnuts on top of your salad right before serving.
Saturday, March 29, 2014
Tater Salad Fake Out
Is anybody besides me ready for a barbecue and some time outdoors? I'm just about losing my mind with the snow, rain and cold this year. When I get my first invitation this spring to an outdoor event, I know what I'm bringing... my newest potato salad recipe. It's low carb and delish. And nobody, and I mean nobody will realize the fake-out unless you tell them. But I'm happy to tell you- it's 1/3 potatoes and 2/3 cauliflower. And the dressing is out-of-this-world good. The Brown Eyed Baker gets the credit for this dressing for sure. There's something magical that happens when you add a bit of bacon fat to your mayo mixture. Double, triple or quadruple this recipe when you're sharing with others. Otherwise this will serve 4.
Cauliflower Potato Salad
2 cups cauliflower florets chopped
1 cup potatoes diced into 1/2 inch pieces
2 hard boiled eggs chopped
1 stalk celery finely chopped
1 T onion finely chopped
5 slices bacon cut into 1/2 inch pieces
1/2 cup mayo (I use the low fat)
1 to 1-1/2 T (or a little more) bacon fat
1 tsp Dijon mustard
1 tsp sugar
1/2 tsp salt
2 tsp capers
Cook potatoes on stovetop for 15 to 20 minutes. Drain, let cool and set aside. While the potatoes are cooking, microwave the cauliflower florets for 3 minutes. When they are done, set them aside and let them cool as well. On medium heat, fry your bacon. Doesn't this look good?
When bacon is browned, remove from pan and drain on paper towels. Pour bacon fat from pan and reserve about 1-2 tablespoons. You'll be using this in your dressing. I actually made my dressing in the pan that I cooked the bacon in. To bacon drippings add your mayo, mustard, sugar, salt, chopped celery, and onions. Whisk to combine.
I think we're ready to put this dish together. In large mixing bowl combine your eggs, potatoes, cauliflower and bacon.
Now add the heavenly dressing and as many capers as you like. I opted for about 2 teaspoons. I give you permission to add more (note- Brown Eyed Baker didn't use capers but used a pickle relish I think).
I ate this immediately, but if you're making it ahead, refrigerate and if the dressing seems a little tight- just add a teaspoon or two of vinegar to loosen it up. I know that will work for sure.
Hurry up Spring- Can't wait to make this dish for my friends!
Wednesday, March 5, 2014
More Comfort Food
Yes, I've been cooking a lot of comfort food lately. It's March and New England weather is so cruel and it's been getting me down. My comfort food routine has been mostly re-heatable dishes and casseroles that allow me to spend some time chatting with my friends on the internet and not slaving over a stove after a snowy ride home from work (like today). My friends are a lot like me, and Carol J (another New Englander) has a recipe on Just a Pinch that I recently "pinched" that most definately had my name on it. I kept hearing it talk to me in my head saying, "Try me. Try me". And so I did. It's definately blog worthy and I hope you'll give it a whirl. It's meaty, cheesy, and contains quite a bit of spinach, my kind of food for sure. I made a few minor changes and tried to cut the calories and fat wherever I could, 'cause that's what I like to do so I can maybe fit into my spring clothes.
Ground Beef, Spinach and Cheese Casserole
Inspired by Carol J from Just a Pinch Recipe Club
12 oz frozen chopped spinach
8 oz neufchatel cheese at room temp
1/2 cup low fat sour cream
3 T skim milk
1 T Boursin spreadable cheese
1 scallion chopped
1/2 medium onion diced
1 pound lean ground beef
2 cups uncooked penne pasta (I use Dreamfields low carb)
15 oz marinara sauce (homemade is best, store bought is fine)
1 cup lower fat shredded cheddar cheese
salt and pepper
Cook spinach. I used the microwave on high for 3 minutes.
Let cool and squeeze out all the moisture. Set aside and cook the penne according to package directions. While pasta is cooking brown your ground beef with diced onion on medium heat. Add a little salt and pepper if you like, I did. I also would recommend some crushed red pepper flakes. I forgot to do that (but I did add it when I served myself a heaping portion at the dinner table).
Now I'm not into stress in the kitchen, but if you can handle this... while beef is browning and pasta is cooking, mix your cream cheese, Boursin, milk and chopped scallion in a bowl and set aside. I was actually able to do this. And I pre heated my oven to 350 degrees as well.
When pasta is done, drain and add to beef mixture. Make sure you drain off any excess fat from the beef before you do this. Now add your marinara sauce. Doesn't this look like a meal on it's own?
Time to get the casserole together. I used my large souffle dish of course, because every casserole deserves to be served in a nice dish, plus it's my all time favorite. Spritz your casserole dish with a little cooking spray and place half your pasta/beef/sauce mixture in the bottom. Top with half the cream cheese mix and top that with all the spinach.
Add the rest of your pasta beef mixture, cover your dish with aluminum foil and bake for 30-40 minutes. Remove from oven, add the remaining cream cheese mixture and top with shredded cheddar. Bake for another 10 minutes uncovered and you're ready to eat this melty, ooey, gooey, yummy meal.
I served this with some toasted slices of parmesan pita triangles so I could scoop up some of the cheesy goodness and was a very happy gal. And no salad needed with this casserole, my veggie was waiting for me inside. Great dish Carol J, it's a definate keeper!.
Monday, December 23, 2013
Loaded Potato and Sausage Soup
The only thing I like about winter in New England is the comfort foods I seem to constantly make. When it's grey and dank outside, and dark at 4:30 pm, a gal's got to feel good indoors right? And that's my goal from December to February. Here's a new soup, Italian inspired, that's hearty and delicious and promises to warm you inside and out. And it's another simple, quick fix.
Loaded Potato and Sausage Soup
Serves about 6
5 sweet Italian chicken sausages
1-1/2 T canola oil
2 Russet potatoes peeled and chopped into 1/2 inch pieces
1 medium onion diced
3 carrots diced
2 celery ribs diced
1-1/2 tsp Old Bay Seasoning
1 can (14.5 oz) fat free low sodium chicken broth
1 can (14.5 oz) water
1 can (14.5 oz) low sodium diced tomatoes
1 can (10.5 oz) 98% fat free low sodium cream of chicken soup
1/2 tsp dried oregano
1 tsp crushed red pepper (use less if you're serving children)
1/2 tsp garlic powder
pinch of salt
1 cup frozen corn defrosted
3 oz fresh spinach
parmesan cheese for garnish (optional)
In large skillet, brown your sausages. I like to keep my heat at medium to medium low. As they start to brown, I poke a few fork holes in each sausage, add a bit of water, cover the pan and let cook until they are almost cooked through. Remove from pan and drain on paper towels. When cool, slice into 1/4 inch disks and set aside.
Prepare your potatoes, carrots, onions, and celery. In large soup pot, add your canola oil. Heat on low and add onions, carrots and celery. Cook a few minutes and add the Old Bay. Stir to incorporate the seasoning. Cover and cook on low for about 5 minutes until veggies begin to soften. Now add your cooked sausage and potatoes.
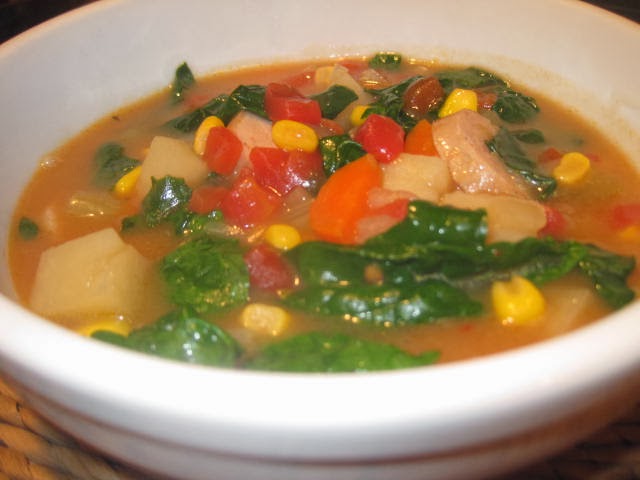
Mix them with the softened vegetables and get ready to open some cans. Add the chicken broth, water, diced tomatoes and and the cream of chicken soup. Bring to a simmer and lower the heat and cook covered on a low simmer for 10 minutes. Add your spices- oregano, red pepper flakes, garlic powder and salt. Cook for another 5 to 7 minutes until potatoes are just about done. Now add your corn and fresh spinach. Turn off the burner, cover and let sit for 5 minutes. You're loaded Potato and Sausage Soup is done. Sprinkle with Parmesan cheese if desired and dig in with some nice crusty bread. It's the perfect utensil to soak up the creamy, rich broth. And you don't need to serve any vegetables with this meal, 'cause they're all in the soup!
As much as I dislike winter in New England, this sure is a fine dish to welcome in the start of the season. And on that note, Merry Christmas and a very Happy New Year to all!
Sunday, July 7, 2013
Roasted Veggie Pasta Salad
We're having a heat wave in New England and I've been looking for lighter type foods to eat. I know a lot of people are firing up their grills and enjoying steaks and other types of goodies, but I've been staying inside enjoying the AC and nibbling on this delicious roasted vegetable pasta salad. If you're feeling like me, Mrs Plah (thank you Carol for that nickname) you might want to give this Mediterranean inspired salad a try. The salad is not plah at all; it's perfect to fight the heat and still enjoy some healthy vegetables, creamy goat cheese and a spunky dressing that will almost make you forget how hot it is outside. And you know I've made it a simple fix.
Mediterranean Inspired Roasted Vegetable Pasta Salad
1 8 oz container grape tomatoes
1 8-1/2 oz can quartered artichoke hearts (in water) drained
12-15 Kalamata olives halved
4 scallions chopped
4 oz goat cheese crumbled
1-1/2 cups penne pasta (I love Dreamfields, low carb)
Olive oil or cooking spray
Salt
Black pepper
Dash of dried oregano
Dressing
1 clove garlic chopped
1 tsp Dijon mustard
1/4 cup plus 1 or 2 extra Ts rice wine vinegar
1/2 cup extra virgin olive oil
kosher salt
freshly ground black pepper
Ready to put this quick dish together? Let's go! Pre heat oven to 375 degrees. Line your baking sheet with aluminum foil for easy clean up. Spritz tomatoes with cooking spray or toss in olive oil and sprinkle with salt and pepper. Bake 15-20 minutes until they begin to pop a bit and get a little toasty brown.
After I roasted these I decided to roast the artichokes. Why not, I thought, because sometimes artichokes out of a can can taste a bit raw. So do the same thing with the chokes. Roast about 8 minutes and flip them over and cook about 8 minutes more. No raw artichokes invited.
While the chokes are cooking, make your dressing and cook your penne pasta. Cook pasta according to package directions and rinse with cold water. To make the dressing combine all ingredients. I like to make mine in a small jar and shake to combine. Finally, time to assemble this salad. Place all veggies in bowl and add pasta and that very small pinch of oregano.
Crumble your goat cheese, add your dressing, and ta-da! salad is ready to be refrigerated for about a 1/2 hour. Serve and enjoy, and don't let the heat get you down!
Re-Mix: to keep it vegetarian, add a T of capers, they will add a nice kick. And a drained, rinsed can of cannellini beans is great for some extra protein. To make more of a meal of this, add a can or two of tuna or salmon. Or to go another route, add a few chopped hard boiled eggs. Sometimes I find that the pasta soaks up a lot of the dressing, so before serving, add an additional T of olive oil and 2 tsp of vinegar, just to regenerate the salad. In this heat we all need a little regenerating.
Wednesday, March 20, 2013
Fridge and Pantry Purge
Yesterday was another messy, sleety, snowy day in New England. I drove to work with white knuckles and came home in the same condition. I had to do something to ease the tension in my body so I decided to cook. I also decided to go through my fridge and pantry and use up some of the ingredients that have been hanging around (maybe just a little too long). This post is not really a recipe, it's a method that I sometimes use that gets me to my desired result- dinner!
I had 3 pieces of bacon which I cooked up, crumbled and set aside. Then I drained most of the bacon fat from the pan and left about a tablespoon in. To the bacon fat I added 3 ounces of chopped baby spinach, 4 ounces of chopped mushrooms and 2 very sad looking scallions.
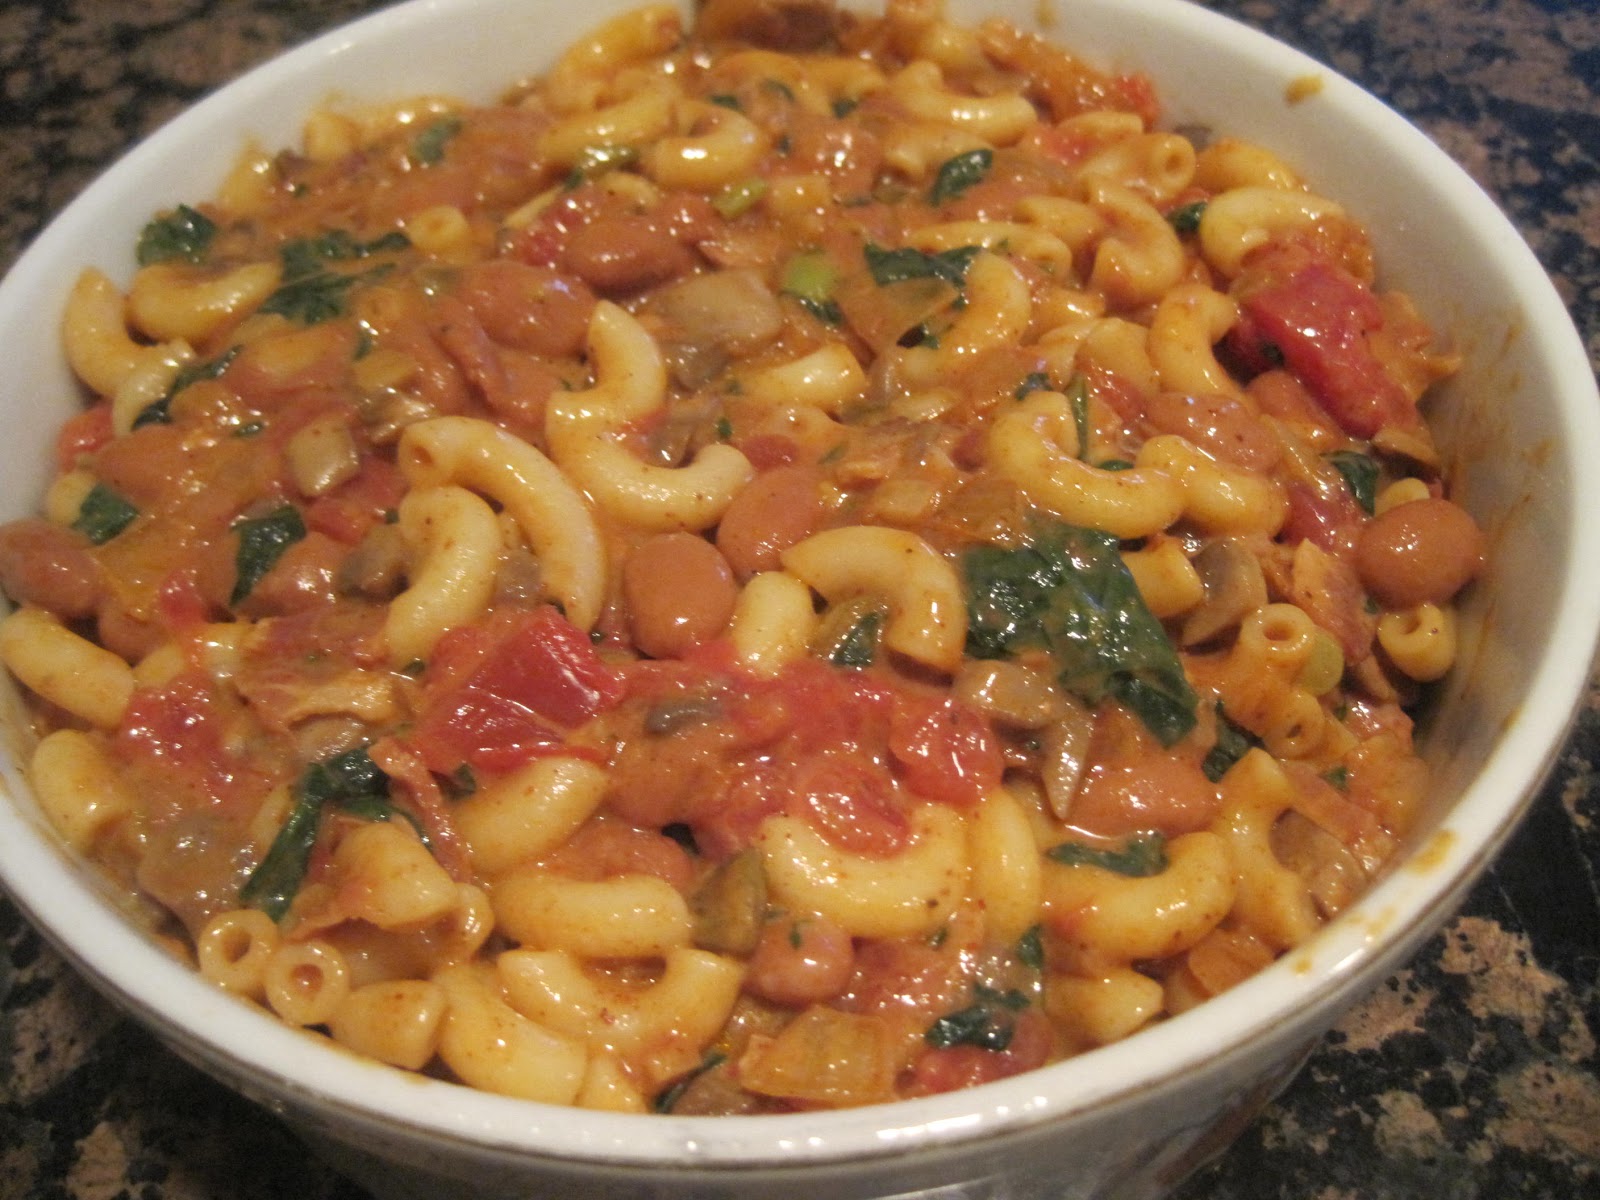
At this point I still wasn't sure where I was going with this, but after a quick look in my pantry, I decided I'd re-mix Dan and Jerry's Chili Mac, and make it Bacon Chil Mac. I cooked 1 cup of Dreamfield's elbow macaroni, opened a 16 ounce can of pinto beans and combined them with the bacon, and spinach/mushroom mixture. I was on the road to happiness.
Good thing I save my bacon fat because I then decided to saute a medium size onion, 4 cloves of minced garlic, 2 teaspoons of chili powder, 1 teaspoon of cumin, 1/2 teaspoon of ground cayenne pepper and 2 tablespoons of tomato paste in another tablespoon of that aromatic fatty bacony goodness.
I spritzed my trusty old souffle dish with cooking spray and put this delicious looking mixture in the oven (covered) for 25 minutes.
Then I added a few handfuls of low fat shredded cheddar cheese, popped the casserole back in the oven (uncovered) for 8 minutes and dinner was ready.
I toasted up some corn tortillas and sprinked the chili mac with cilanto and was a very happy camper. The weathermen/women are predicting a little more snow for tomorrow, but I've got leftovers to comfort me. And by the way, this microwaves beautifully, I had some for lunch today at work.
Labels:
bacon,
beans,
casseroles,
cheese,
garlic,
make ahead,
mushrooms,
spicy,
spinach,
Tex-Mex
Friday, March 15, 2013
Crunchy Chewy Granola Bars
I've been making granola bars for years because I just can't eat the packaged ones found in the grocery store. Either they're too sweet, too crunchy, or taste like tree bark. And as much as I try to be a nature lover, tree bark is not something I'd like to ingest.
A few months ago I bought a baking pan with square indentations, and last night when I was mixing up the batter for some peanut butter raisin granola bars, the light went off in my head- Use the new pan for the bars, you'll get 4 sides of crunchy crust and a chewy middle in each and every bar.
Peanut Butter Raisin Granola Bars
Makes 8 individual 2-1/2 inch square bars
Cooking spray
1/2 stick butter
2 egg whites
1/2 cup creamy peanut butter
1/3 cup Splenda no calorie sweetener
1/4 cup honey
2 cups old fashioned oats
1 tsp ground cinnamon
1/2 cup raisins
Pre heat oven to 350 degrees. Prep pan with cooking spray. Melt butter and set aside to cool. In large mixing bowl beat egg whites until frothy. Mix in peanut butter, sugar and honey. Here's a nice tip: spray your measuring cups with cooking spray before adding peanut butter and honey and they won't stick, they'll slide right out. Now add the butter and mix. You'll have a very smooth mixture at this point. Now it's time to add the oats and cinnamon. Sometimes I add the oats whole. But last night I took 3/4 cup of oats and pulverized them in my spice grinder. I like the end result better this way, but if you're too lazy to do this, go ahead and add the oats without the grinding step. Now add the raisins.
If you're using a pan like mine, you'll get 8 bars that are between 3/4 inch to 1 inch deep. Place batter into square indentations and smooth with your clean hands. You're now ready for a quick bake.
Bake 12-15 minutes in middle rack until edges begin to slightly brown. Do not overcook.
Let cool about a half hour and enjoy!
Re-Mix: There are so many variations for this recipe and I don't believe I've tried them all yet, but here are some ideas. Instead of the raisins add mini chocolate chips and a little vanilla extract. Crushed roasted peanuts are always a welcome addition, and I have even added macademia nuts and candied pineapple, which is really a treat. And even better than the Splenda sweetener, is brown sugar. Oh, and if you are a fan of dried fruit, add some dried apricots for some zing. Go through your fridge and freezer, I bet you've got ingredients for your own custom made granola bars. Just remember that cinnamon is a strong spice and it might have to be eliminated with certain combinations.
If you don't have a pan like mine, this recipe will work in an 8 x 8 inch pan, baked for 20 minutes. I would cut the bars into 12 pieces (4 x 3) not quite square.
Monday, March 11, 2013
Tortilla and Egg Bake
I was doing a bit of experimenting last night. I love to cook ahead and then reheat because it just makes my life so much easier. And I was curious if eggs baked in tortilla shells would stand up to the reheating process of nuking at the office. I have a large muffin pan that contains 6 muffin holes that measure 4 inches in diameter that I used to use for mini quiches. I pulled this rarely used dinosaur out of the cupbaord and got to work. I had 4 six inch corn tortillas on hand, warmed them a few seconds in the microwave and nestled them inside four of the round indentations that were misted lightly with cooking spray.
They seemed to fit okay, so I proceded to sautee a few veggies in canola oil that I thought would go well with the tortillas and eggs. I used 1/2 a red pepper chopped, 1 small onion chopped, 1 jalapeno pepper chopped, 1/4 cup or so of black beans and some spices: salt, pepper, and 1/4 tsp each of cumin and chili powder.
I added this aromatic mixture to the bottom of the tortillas, and topped each with about a tsp of store bought salsa. So far so good. At this point I pre heated the oven to 425 degrees.
How could I make any Tex-Mex dish without adding cheese? Had to do it, so I added as much shredded sharp cheddar as I could fit in, still leaving room for the eggs.
I added a splash of half and half, some salt and pepper and topped each tortilla with a few extra black beans and baked them for 12 minutes which seemed to be the perfect time. The eggs were still soft, the tortillas were crispy and the insides were hot. After they cooled a bit I wrapped them up, put them in the fridge excited for the morning experiment.
I did not bring my camera to work so I do not have a picture of the re-heated, microwaved egg tortilla, and I must say, for once- one of my experiments actually worked on the first try. The tortilla stayed crisp, the egg was still soft and the inside veggies were warm and delicious. If I weren't eating this on the run at work I would have garnished with sour cream, a little more salsa, more cheese of course and cilantro leaves. Give this a try and get even more creative than I was. The possibilities are endless.
Subscribe to:
Posts (Atom)