Sunday, November 25, 2012

Stuffed Again


I've been baking egg rolls again and decided on this go-round to stuff them with Italian sausage, sauteed mushrooms, ricotta cheese and fresh basil. Flavor packed, baked cannelloni is actually what they are. There are a few steps involved, but the dish is rather simple and fun to make. Here's the recipe:

Mushroom, Sausage, Ricotta, and Basil Cannelloni
Makes 16 mini cannelloni, 2 or 3 cannelloni per person for dinner entree

Mushroom Filling
1 T olive oil
8 oz button mushrooms
2 garlic cloves finely chopped
1/2 tsp salt
freshly ground black pepper

Ricotta Filling
8 oz low fat ricotta cheese
1 egg lightly beaten
1/4 cup grated parmesan cheese
1/3 cup shredded part skim mozzarella cheese
1 tsp crushed red pepper flakes
pinch of salt
freshly ground black pepper

Sausage Filling
3 sweet Italian sausages removed from casings
2 tsp olive oil

8 egg roll wrappers cut in half
1 24 oz jar tomato/spaghetti sauce- I like Paul Newman's tomato basil
1 bunch of fresh basil
additional mozzarella for topping
additional parmesan for topping

Let's get cooking- To prepare the mushrooms: Add oil to large pan on stove top and set heat to medium/medium low. Add mushrooms and garlic and cook until brown (this could take anywhere from 8 minutes to 20, depending on your stove). But do not let the garlic burn! I'd rather take the time to let let my mushrooms brown on a lower heat than have burnt, acrid tasting garlic.


When mushrooms are done remove to a separate bowl and set aside. It's time to cook the sausage. I used 3 sweet Italian sausages removed from their casings and sauteed them on medium in a small amount of oil.


When all the pinkness is gone from the meat (10 minutes or so) add 1/4 cup of tomato sauce. Stir to combine and then set this mixture aside.


Ready for the cheese? In small bowl combine all ingredients.


When cheese mixture is ready, that means you're ready to start rolling your egg roll cannellonis. Get your basil out, cut your egg rolls in half and prep a baking dish with a 1/3 cup of tomato sauce. Pre heat oven to 375 degrees.


On cutting board or work surface place one egg roll strip and in the center and add 2 or 3 mushrooms. This is layer one. You don't want to over fill the egg rolls or they won't close and/or bake properly. You'll see what I'm talking about as we keep adding ingredients.


Top with the ricotta mixture. About 2 teaspoons will do.


Now add the sausage, about 2 teaspoons of that too.


Looking pretty good so far, don't you think? Now top with a basil leaf. My basil leaves were so huge, I decided to cut them in half. Top with a pinch of mozzarella or parmesan and we're ready to roll this baby up.


Fold the back side of the egg roll over the top. Now roll the front side to meet the back. You should have about a 1/4 inch overlap. Place rolled cannelloni in baking dish. seam side down.


Now that you've got the idea, keep rolling. You've got 15 more to do. The assembly and rolling go quickly and to me this is the fun part. By the time you're halfway through, you'll have it down to a science.


Top the cannelloni with remaining sauce (you may have some left over-save it) and sprinkle with mozzarella and parmesan. They are ready to go into your pre heated oven.


Bake uncovered for 35 minutes. 


Let cool a bit, garnish with fresh basil and dig into these little bundles of flavor.
 
 
I heated up some of my left over tomato sauce and served it along side the cannelloni. Even though the cannelloni didn't need it, the crusty bread that accompanied the meal enjoyed a dunk or two in the tomato sauce and kept coming back for more. I hope you enjoy this recipe as much as I do. It's a super dinner and also a nice appetizer (just serve smaller portions). Since it's becoming cocktail party season, I'm wondering if I can make these into bite sized appetizers. I have so many egg roll wrappers left, it just might happen soon. Thanks for reading! 

Sunday, November 11, 2012

Joltin' Joe Cupcakes


I love when a fellow cook recommends a product and it turns out to be something I go crazy for. Annette told me about JIF's new Mocha Cappuccino Hazelnut Spread, and we're all lucky I didn't eat every ounce of it with a spoon right our of the jar. Otherwise I wouldn't be posting these decadent little brownie bites. If you haven't seen this product, look it for next to the peanut butter in your grocery store. Here's what it looks like:


I loved the oreo brownies I made a few weeks ago, but always like to re-mix a recipe and come up with something different. So when I tried this yummy delicious  product I decided that cappuccino brownies would be a good start for a re-mix, and I was right.

Mocha Cappuccino Mini Brownie Cupcakes
makes 20-22 mini cupcakes

1/2 14.1 oz jar JIF Mocha Cappuccino Spread
1 box Pillsbury Sugar Free Chocolate Brownie mix- I do alter the instructions given on the box, so you'll need 2 eggs (not one), 3 T  prepared coffee plus 1 tsp instant coffee (instead of the water) and the recommended 1/3 cup canola oil

Frosting
1/4 cup softened butter
4 oz neufchatel cheese
1 T JIF mocha cappuccino spread
2 T powdered sugar
1 T instant coffee for dusting

Pre heat oven to 350 degrees.  Place cupcake liners in 2 mini cupcake tins (12  per cupcake pan). Prepare  brownie mix according to package directions, substituting 2 eggs (for the one they recommend) and the coffee for the water plus the tsp of instant coffee. Now add the canola oil. Stir until combined (Pillsbury recommends 50 hand mixed strokes). Place a tablespoon  of brownie mixture in the bottom of each cupcake liner. Now top with a teaspoon of the JIF spread. Looks good, doesn't it?


Top each cupcake with remaining brownie mix. Try and be neat if you can. I got a little sloppy, but it really didn't matter too much, because the messy ones still tasted great. Bake 12 minutes and set aside to cool. Here's a sloppy brownie after baking.

:
 And here's a pretty good example of what you're striving for.


When cupcakes are cool, prepare the frosting. Combine all ingredients (except instant coffee) using a hand mixer.  Top each cupcake with a dollop of frosting and sprinkle with powdered instant coffee.

Saturday, November 10, 2012

Saucy


I'm a saucy kind of gal and jump at every opportunity to try a new dunkable dip or sauce. Carol J, an internet friend introduced me to a pineapple mustard sauce that I coupled with honey mustard chicken tenders, and I definately have to share this little gem. The sauce is sweet from the pineapple and brown sugar, and tangy from the lemon and mustard. Plus it's quick and simple. Here's my variation of Carol's recipe, and yet another version of chicken tenders.

Chicken Tenders with Pineapple Dipping Sauce

To make the sauce you'll need:
1/2 cup Splenda Brown Sugar Blend- or 1 cup regular brown sugar
1 T corn starch
1/4 tsp kosher salt
1 8oz can crushed pineapple
Juice of one lemon
1 T Dijon mustard

To make the chicken you'll need:
Soaking Mixture
1-1/2 pounds chicken tenders
2 large eggs
1 T Dijon mustard
1 T honey
1/2 tsp kosher salt
1/4 tsp ground black pepper
Splash of water

Breading Mixture
2 cups panko bread crumbs/flakes
2 T flour
1/2 tsp kosher salt
1/4 tsp black pepper
1/2 tsp garlic powder
1/2 tsp onion powder
1/2 tsp dried tarragon leaves

Cooking spray or olive oil for browning the chicken

This is a pretty quick fix, so let's get going. Wash chicken and set aside. Pre heat oven to 375 degrees. In medium size bowl add all soaking ingredients.


Whisk until combined.  Add chicken and let it bathe in the egg mixture while you prepare the coating.


In separate bowl, combine the breading ingredients. Your oven should be pre heated by now, so you're almost ready to bake. Cover a baking sheet with aluminum foil and spray with cooking spray. Take each chicken tender and cover both sides with bread mixture. Place on prepared baking sheet.


Drizzle with a bit of olive oil and bake 35-40 minutes, turning the tenders over at the halfway point. While the chicken is cooking, make the pineapple sauce. In small saucepan combine all sauce ingredients.


Cook over medium heat until bubbly, stirring often.


The sauce comes together very quickly, maybe three or four minutes at the most. Now you're ready to eat. You can serve this hot, cold or room temp. It's delicious any way, I've been dipping all night.


I'm so excited about this sauce because it's not just for dipping. I think it's a great accompaniment to dishes like grilled or baked pork or lamb chops. And it's a nice substitute for apple sauce, and who knows what else?    

Friday, November 9, 2012

Chili Mac


I've been making a lot of Tex Mex dishes since joining Just a Pinch about a year ago. What a great web site for home cooks. The membership is world wide and the variety of recipes on there can at times be overwhelming. Like what should I make first? Should I go off my diet?  Well if I'm going off my diet, what should I make first? You get the picture. So tonight I made Dan Clark's Chili Mac. Being a northern gal, I'd never had chili mac and wanted to give it a try. It's similar to American Chop Suey, but has a nice bite. Dan is a great cook, and most of the recipes I've seen of his have been done outdoors on a smoker or grill. I don't do that kind of cooking so when he posted this recipe I took the bait. I made a few changes- halved the recipe, added some pork sausage to the ground beef and used Dreamfield's elbow macaroni. This was the perfect dish to end a miserable weather week and say goodbye to the noreaster that hit us on Tuesday, Wednesday and Thursday.

Chili Mac
Serves 4-6

1 cup uncooked elbow macaroni
3/4 pound ground beef
2 sweet Italian sausages, removed from casings
1 medium onion diced
4-5 cloves garlic minced (about 1-1/2 T)
1 14 oz can petit diced tomatoes (I used no salt added, and added my own salt later)
1 16 oz can kidney beans, drained and rinsed
3 oz tomato paste (half a small can)
1 4 oz can chopped green chilies
3/4 tsp kosher salt
2 tsp chili powder (I would have used a bit more but I ran out)
1 tsp ground cumin
1/4 tsp freshly ground black pepper
1/2 tsp ground cayenne pepper
5 oz Mexican Blend 2% shredded cheese

Pre heat oven to 375 degrees. Cook macaroni according to package directions until just less than al dente. Meanwhile, in large skillet over medium heat brown ground beef, sausages, onion and garlic until meat is no longer pink.


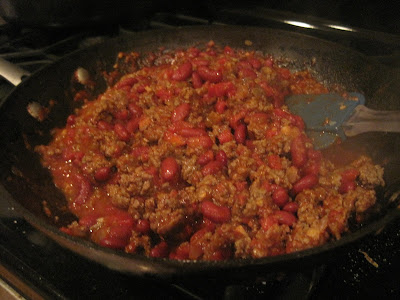
Drain fat and return to stove. Add remaining ingredients except for the cheese.


Drain macaroni, add to meat/bean mixture and stir to combine. Cover and simmer 5 minutes.


Transfer to a baking dish coated with cooking spray. I used my good old souffle dish.


Cover with aluminum foil and bake 25 minutes. Uncover, top with cheese and bake 8 minutes more. Cheese will be ooey, gooey and melty.


This is comfort food at it's best. I'll be making this again for sure and I'll probably add a fresh green pepper to the onion, garlic, and meat saute. This was so good, I'd serve it to company with a crisp green salad dressed with a lemon vinegarette and homemade cornbread. Which reminds me, the cornbread recipe needs to be shared.